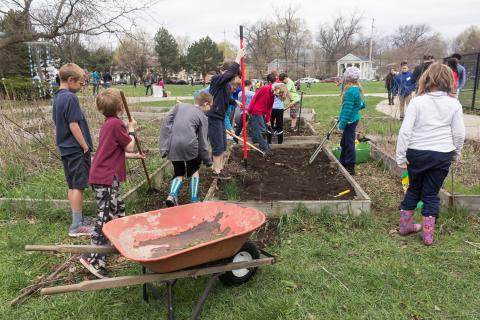
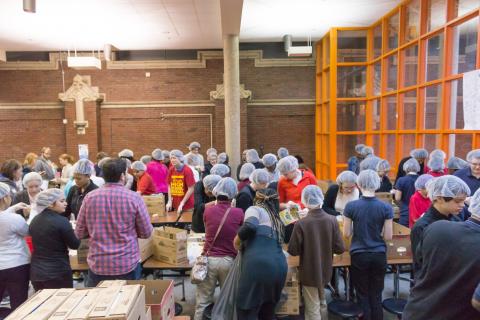
 School-wide projects are an amazing way to develop community, empathy, and a buzz about philanthropy throughout an entire school campus.
The size of a school will often determine the scope of the project. It may seem intimidating to do a project with 1,000 students or even 100. But great things can be accomplished with many hands and strong preparation with communication easing a project into fruition.
The following 11 steps will help you when you're planning a large school-wide service-learning project!
Step One – Youth Voice
First you should consider students voice when planning a school wide project. Ask your self: What do the students want to do? What are their passions? What in the community do they care about? Perhaps do this through an open discussion in each of the classrooms and then collect the responses and put them in a school wide poll. Or, utilize the student council or other student leadership group to take the initiative of choice. Check out our Build Community resources for activities that get at students' passions and interests. Allowing the students to have a voice in the coordination will strongly increase their sense of ownership and responsibility for the project.
Step Two – Assess the Community Need
Once the students’ have had their say, it’s time to reach out to the community to find out what the true needs are. No one should spend time on a project that is not really needed in the community or creates more work for the recipient of the service. So this step should never be overlooked. Some organizations post need lists or wish lists on their websites. With other organizations, you may have to ask what needs there are this year. Be aware that needs may change based on seasons, so a certain service project may be best at a certain time of year for a community partner. Check out our Develop Skills and Knowledge page for activities and lessons that get at community needs.
 Step Three – Develop the Project Idea
Once the community needs have been identified, decide among the faculty or the student leadership what is a feasible project for the students to do. Some partners have age limits for volunteering at their location (i.e. most humane societies and construction sites). Learning to Give is a great resource for identifying projects that have been done in the past and can be used as a springboard for developing your own project. Project ideas can be found throughout most lessons and are especially identifiable through the community needs lens in the Issues Area page.
Step Four – Establish a Community Partner
Before you begin the project, be sure to reach out to the community partner with which your school plans on assisting and establish a strong connection. Organizations and businesses have busy seasons so it is best to make sure that the timing works for them as well as your school calendar. Be clear in these discussions about what you plan to do and what logistics will be necessary for seeing the project through. (i.e. If you do a book drive, who's role is it to collect the books?) Many times a relationship can be formed with a community partner by doing a similar project with a new group of students every year. The Open Doors to Your Community guides can introduce students to local nonprofits.
Step Five – Develop the Curriculum Ties
Whether the project is on the school’s campus or on a field trip, preparation through connection to the current curriculum will deepen the learning impact for each student. If the students are informed of the targeted community need through the academic lens of Math, Science, Language Arts, Social Studies, or other core curriculum standards, they will be able to see the real-world application of their studies. Learning to Give provides activities and lesson plans across subject areas and community needs.
Step Six – Develop the Logistics of the day
Have the students make a list of all the materials that might be needed for the service project and where they might acquire the materials. The emphasis here should be placed on practical logistics for the service project. For example, if you are running a book drive, where are the books going to be stored? In bags or boxes? Where will the boxes be kept? In what room(s)? If you need boxes, where will they come from? Many stores like Home Depot or department stores will do in-kind donations for service projects. Check the process in advance and perhaps have the students apply for the needed materials! Be sure to look to the Service-Learning process and allow your students to lead the planning!
Step Seven – Volunteers, Chaperones, and Incident Plan
For very large-scale projects, volunteers or chaperones will be needed to add an extra layer of engagement and coordination to the project. In some cases, high school students can be the leaders for their peers or for middle and elementary school students. If involving other adults or student leaders as official coordinators, be sure to have an incident plan in place. What if a student has an allergic reaction? Or loses their phone? Or drops a shovel on their toe? All project leaders should be prepared to direct incidents in a certain way.
Step Eight – Apply for Grants (if needed) and develop a backup plan with no funding needed
Once you have the community partner, project idea, and tangible ties to your curriculum writing a grant will be easy! Finding the grant may take time, but there are often many grants out there for service projects especially leading up to national days of service like Martin Luther King Jr. Day, Earth Day, Global Youth Service Day, and more. Though it is always a good idea to develop a backup plan for a project that does not require funding as an alternative if funds do not come through.
Step Nine – File the Proper Paperwork and Permits
In most school systems there is an extensive paper trail that follows each of the students and the building processes. Be sure to check with the secretary, principal, or other administrators about paperwork that might be necessary for the project. (i.e., A building-use form if the project will take place in the cafeteria or field trip permission slips). Technicalities can be the worst hold-up for projects, so it is best to double-check that the proper paperwork has been submitted and is in on time.
 Step Ten – Live the Project
By this point, all the pieces should be in place for a successful large-scale project. So have fun! Be engaged! Ask critical questions about service to encourage the students to think deeply about their actions as much as the result. Be sure to check in with the community partner if they are present to make sure everyone is on the same page.
Step Eleven – Facilitate Reflection
At the end of the project or during the days to come, be sure to provide adequate reflection time for students and faculty. Provide opportunity for group discussion, a survey, or reflection through writing a paper. Even if it is just one required paragraph of their thoughts about the service project, this reflection is key for instilling a sense of ownership and emotional processing. These reflections can also help refine topics and processes for future projects.
Guest Blog edited September 2019; by Megan Lendman, Grand Rapids Public Schools Service-Learning Coordinator: 2015-17 Michigan Nonprofit Association AmeriCorps VISTA
